Posted on

Mk1 Vr6 Hardware Videos and Install Tips

I made a couple hardware overviews for our MK1 Vr6 kits, and I still have a few questions that I either didn’t address in one video or a tip I forgot, I am going to add a couple more videos soon, but this may make finding the info you’re looking for a little easier, if you have questions before during or after install please feel free to email me! Sal@s-pautomotive.com


General install Tips:

  • Press your bushings in before you mount the brackets onto the motor or chassis
  • If you have an 02j trans the upper trans mount holes are threaded, you need to drill them out to use the hardware provided
  • Grease the inner speedo cable with a silicone grease before installing!
  • I find it easier to set the radiator in the core support before I install the motor – but not bolt it down
  • For a cleaner install on a AAA motor if you’re not using the AC/PS systems cut the bracket off just below the alternator mounting points to the block.
  • Always start all the bolts in a bracket, manifold,cover etc before tightening any of them down
  • If you are using the mk1 fuel lines, the best place to cut them I have found is just before the cross behind the steering knuckle, you can carefully hand bend them up toward the passenger strut tower and trim again to your desired length
  • Work the exhaust system from front to back, hang everything loose in the clamps and work each section into final placement front to back as well
  • If you’re using one of our harnesses the “Trigger” needs to have power in both the key positions START and RUN – this is often the problem for a no start, someone didn’t check that the wire they chose had power during the crank key cycle. A good source for this is your former coil power wire on gasoline cars, on diesels the injection pump power wire works well.


Posted on

Install Videos !!


We have needed to do this since the first day we said, “Why don’t we ship out parts for everyone to put a tdi into their mk1” …


Well almost 10 years later, and we have a good start on a video library for using and installing our parts..


4cly Motor/Trans Parts Overview :


Hydro Clutch Kit


Mk1 DBW Pedal Install


Mk1 02a/ 02j Linkage Install


Mk1 Vr6 Hardware Overview:


Mk1 VR6 Harware Install 1&2:


Wiring Harness Removal Videos –

Mk4


Mk3


Recaro Seat Frame Install


Installing one of our “Standalone” style harnesses into a mk1 (this is a 24v but all of the connections to the car will be the same as any of our swap harnesses)


A shorter more concise version is here


MK1 02j Shift Box Install


Posted on

Billet Coolant Sensor Adapters

These adapters are great if you are a mk1 owner with a mk3/4/5 swapped chassis and are needing to keep that mk1 cluster working perfectly.. Simply install this in one of the spare locations found in the coolant system, attach the included ground wire, thread your sensor into the adapter, attach your original signal wire and boom, a working mk1 cluster again!

They also work for aftermarket gauge installations for the mk3/4/5 owners, install the sensor into the adapter, ground the adapter with the provided ground wire, install into the coolant flange, enjoy an aftermarket gauge in your cockpit!

*sensor thread size is m10x1*


$24.00 shipped in the USA Check them out HERE

Posted on

S&P Digital to Analog Tach Converter/Adapter with Cylinder Correction

Here is our “magic” box !! Its a dual purpose unit and has 2 modules in it, digital>analog + cylinder conversion. It’s used for many applications, putting a VR6/1.8t/TDI/2.0 into a mk1/2 and retaining your factory cluster.  (However if you wanted to drop an ls1 into your mk1 and drive the stock tach, this will do it for you)


This module will allow your factory cluster to read the correct rpm of the engine. It will save time on not having to do a dash swap or retrofitting the 6 cylinder cluster and allow you to maintain that stock sleeper look inside your mk1 or mk2.

In stock and ready to ship HERE


We are going to test soon on vanagon, beetle ect for those running subaru or late model swaps in their aircooled beasts..

Posted on

S&P Mk1 Fan Shrouds

A custom radiator like OURS needs a custom shroud, well now we have one.  These aluminum shrouds are designed to be used with our radiators, they can also be fitted to a stock mk1 or mk2 radiator with minimal user modification.


We are using a high quality, well balanced 10″ 1650 CFM fan.  The fans can be purchased separately HERE.


image


Finishes for the shrouds will include, polished or raw aluminum, for an extra fee we can have them powder coated.  We will be offering an option as a complete cooling package with our radiators, already wired with a relay and temp sensor all you will need to do is hook up a labeled power and ground, plumb the coolant lines and you’re running cooler than before!  Check out the shrouds in our store NOW!

Posted on

Summer Software Sale

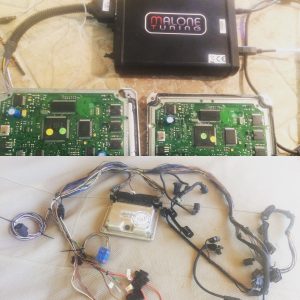
It’s time for a summer sale, if you are thinking about a mk4 motor swap for your mk1, we are offering 20 percent off your wiring harness work or ecu tuning when you purchase an integration kit from us. This offer is good until around mid August. Purchase of the integration kit must be between July 10 and August 15, your harness can be scheduled up to a month after that. image image


Posted on

S&P Radiators For Your MK1 Swaps

So you’ve installed your new mk4 powerplant into your mk1, now you are left with plumbing it in.  Some swaps (vr6 specifically, the TDIs dont fit well either.) require you to modify the radiator, and finding stock hoses that will work can be a scavenge-fest.

We have used a stock mk1 rabbit radiator flipped upside down, then you have to cap the overflow port, and it wants to leak eventually, not to mention that your temp switch is now across the engine bay and in the way of everything you just installed..

Soo… we went looking for OEM options, found a dasher radiator that works pretty well, unfortunately the aftermarket support for Dashers is very small.  There seems to be little to no stock of the replacement dasher radiators anymore. Leading us to our natural course of action, make something that works the way we want.


In about 1-2 months, we will be stocked with a new radiator for your swaps.  Fully tig welded endtanks, no plastic all aluminum construction coupled with the dual pass design will help keep your rabbit running cool. Stock mounting pins and core-support mounting tabs are in place.  We also have removed the overflow port as most mk4 based swaps have a port on the motor or in the factory hoses.

These will also work for those who want to run carbs or ITBS and are using some sort of an overflow container.


dualflowvw search rescue 2sciroccorad2sciroccorad1sciroccorad3


Posted on

24k – Sal’s Vr6 Swapped Mk2 Golf

Sal Robertson, co-owner of S&P Automotive, bought this car a little over a year ago. Having owned and built a lot of different VWs, he decided to let this one sit for a while whilst he decided ultimately what direction to go with the car.

sp720-130

To kick things off, Sal shipped the car off to his painter to have the car resprayed in the OEM LE1V Gold Metallic, thus beginning with the car’s moniker of 24K.

sp720-113

While the car was away a low mileage 24V VR6 and a 1995 2.0 GTI donor car were sourced. The 4 lug suspension, coilovers, Nuespeed F&R sways, 10.1” brakes for a base were reappropriated, and a host of new parts from axles, and brakes, down to the tie-rods and some hot cams were thrown in the mix.

sp720-106 sp720-105

After getting the car back, Sal went to town. Inside an awesome set of low bolster Recaros were placed in the front and matched to the OEM tweed on the rears and the door cards. The dash and plastics were re-dyed to the original dark brown, and the cluster was treated to some Autometer ES gauges to keep an eye on things under the hood.

sp720-108

The car presently rides on those pristine Ronal Turbos IIs and perfectly fitted Kumhos, but we don’t know for sure that those will be permanent…

Eurobumpers and e-code lights finish up the exterior of the car, keeping it simple and classic.

sp720-143

As far as entertainment, and the sound system… What better soundtrack could one have than a mildly massaged 2.8 24V VR exhaling through a 2.5” Borla exhaust? IMHO, none. Whilst idling, the car gently purrs with nary a loud rumble to clue you in on the work that has gone on; until you hit the pedal on the right, that is.

sp720-147

Some might call it too simple, saying that it needs some 16 by eleventy wheels, mad camber, and tires that look impossible to mount or drive on. But, this car… clean, classy, and 24K all the way.

sp720-134

Coming soon, an inside look into S&P Automotive and a few other recent builds. Be sure to check back, and hit the like button over on Facebook!

sp720-137

-CM
sr83.com


But we can’t forget about Seth’s Jetta!!!
Another fine example of S&P Original goodness, when Seth saw this thing, he had to have it.

sp720-133

It wasn’t in its current state when he bought it from Sal & Perry, it took a little of Seth’s imagination and S&P’s elbow grease to fit the 12v vr6, complete with fully polished Schrick intake manifold.

img_1535

Yea, those are common, just roll out to your local bone yard, they’re everywhere…
While Sal chose the old school feel with the golf, Seth felt that the original Recaro Trophies just werent quite what he was looking for and opted for front & rear Recaros from a Mk4 GLI.

dsc_4815 dsc_5780

Now don’t get me wrong, I’m all about keeping certain cars true to their vintage roots, but there’s a lot to be said about a slightly more modern, comfortable seat, that’ll hold you through the twisties.

img_8952

These days, low seems to be the only thing people think about when “building” a car. And though I’m a fan of all aspects of suspension and wheel fitment, I have to say, its quite relieving to come across enthusiasts these days who can build their cars and drive them, rather than garage queens and speed-bump dodgers.

img_1740x

Thanks for the opportunity to shoot your cars guys.

For more info on S&P Originals, check out their website at S&P Automotive!

-Josh
sr83.com